Assignment 2

3D Object – 
3D printing
Laser cutting
Water jet cutting
Folded
Wax Mould

2D Object –
Printing
Books, Magazine, cards, vinyl cut / sticker, crafts, Etching, 

Experiential Installation *
VR
Projection
Something new

(Has to be influenced and or interacted with by the audience)

Below leads into Processing and out of processing you get a 3D Object or into another physical form
\/\/\/\/\/\/

Data/Input (Sound)

Design Principles Contrast, movement, balance,etc

Light /LDR (Light Dependant Resistor) 

Camera, Heart rate, Grades, Sleep, Traffic, Pressure, Census, Depth n distance, Screen time

I would like to do a 2D printed object as my format

For my design I drew inspiration through the different classes of processing by looking at the different colours shapes and styles on the site below, trying to combine them in processing https://www.openprocessing.org/class/1640/

Final Outputs

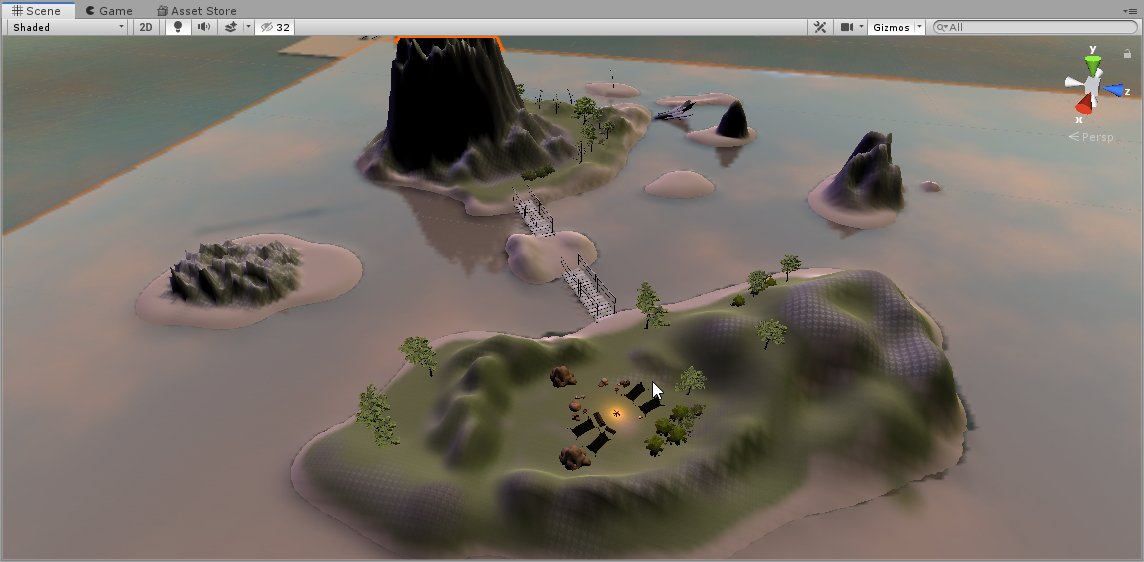
Unity – The Lost Islands

For my final output for Unity i wanted to keep working on my map from earlier, after review i noticed that the map was missing substance to it and it felt bland so decided to raise terrain to make a couple more smaller islands and to make the map feel more like a video game I found some pretty cool assets on the asset store which i built a camp with. I also felt that the islands were lacking in greenery so i added more trees and added bushes to make it feel a bit more realistic. I wanted to add a player model with a controller so that people could play the map but i fell short of time when i kept getting errors and couldn’t fix it.

Three.JS – Rainbow Static

With my three.js output I liked the work i had previously done with the knot geometry so i decided to do another knot but adjusted the geometry further to get a new shape. I started by making it into a wire frame and enabled trails. To take the cool wire-frame look further i made it so that every point will morph randomly and because the geometry shape that i chose this time has many more points making the trails a spectacle. Initially i had the mesh rotate slowly but I wanted it to look hectic and out of control but also in an aesthetically pleasing way so i made the mesh rotate a lot faster on the z axis. I also moved the camera further out away from the mesh so that we can see it scatter across the screen instead of taking up the whole space.

Processing – Event Horizon

For my processing output i combined two of my previous works together and adjusted to make the two compatible. To start I made it so that when the mouse is unpressed it will make a snake like shape using a small ellipse and it will follow where the mouse points because i changed the X and Y variables to mouseX mouseY. When the mouse is pressed in the instead of tracking the mouse there are two ellipses in the middle that change size based on the mouseX and mouseY axis but because the two ellipses follow opposite directions of the mouse they can create cool patterns and designs through random or purposeful mouse movement.

Conditional Design – Dot and Knot

Rules:
-Each player places 10 or more dots where there is the most empty space on the page (one after another)
-After placing dots you will have to connect the dots to each other creating one big knot
-You have to jump over at-least 1 line but no more than 2 before reaching the next dot
-You can’t jump over your own line
-You may take any path to the dot as-long as it follows the rules

I decided to go back to the original idea i liked the most with the knots but with slightly different rules such as instead of having to loop under and over you just jump over upto 2 lines and the placing of the dots means you have to think about your next move and how you are going to get to the dot without trapping yourself. You are considered trapped if you have no other choice but to jump your own line or jump more than 2 lines to get to your dot. An interesting thing i noticed about this design is that because you know where you have to get to people will often give the lines extra squiggles even though you may be able to just draw a straight line and this made the design look more interesting.

Week 4 – UNITY

Above I use a first person controller added to a droid model i had previously had and used it to show the physics of the cardboard boxes, previously i had many more boxes but from testing i found that it was alot harder to push through alot of boxes and the droid would get stuck so reduced the boxes so that it would seem more fun to play with the boxes

Again in this i use the cardboard boxes but instead i use random moving script which tells the boxes to move in a certain direction on the X,Y,Z axis direction at the speed assigned, i decided to put the cardboard boxes in a big box to observe how the random movement would adhere to being restricted my the walls around it. I oddly found out that the boxes were always gravitating towards the back right corner despite changing the variables.

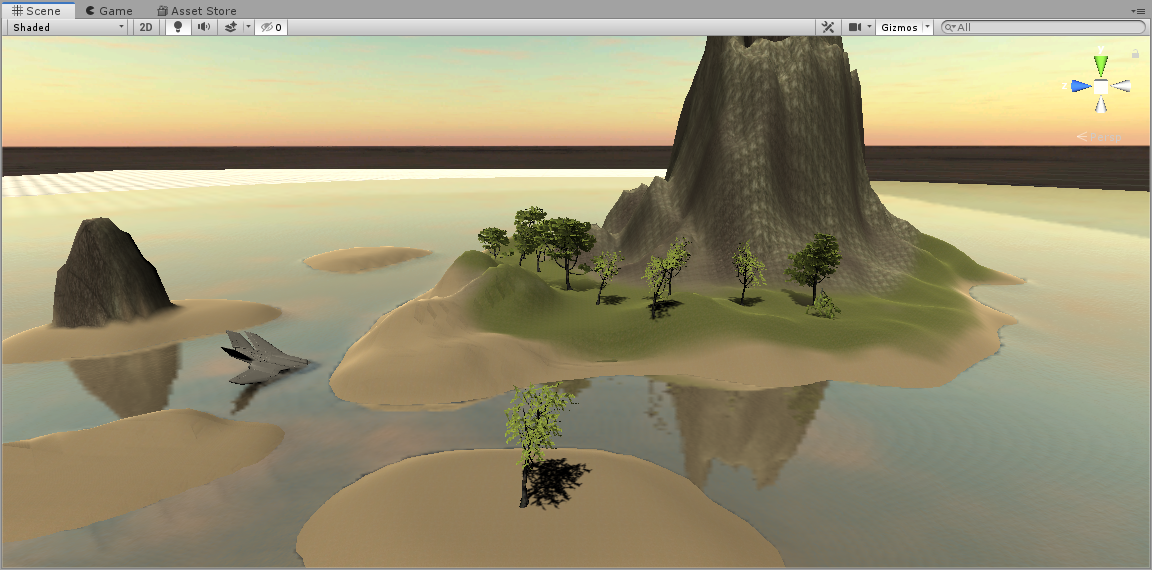
For this project i decided i wanted to create a world so i started off creating the main island section by raising the terrain to my liking i then added the water and sky box but realized it was quite what i wanted so i searched the asset store to find what i have on screen. After completing the main island it still felt bare so i added in a few smaller islands of sand around it. When reflecting after this i thought it would be cool to make this world feel more like game with an objective so i added in a crashed jet in the water as to say thats how the player if made were to get on this island.

Above and an example that when you scroll in our out takes you to another piece of the company’s work

Week 3 – THREE.JS

My first time using three.js i used a tetrahedron shape and made it rotate and move across the screen creating these jagged lines i also decided that i’d want the colours to change and also used flat shading to give it that seamless transition when changing colours.

In this project i used a Torus knot but manipulated the geometries and scaled creating this unique pattern of crossed lines, to get the look that i wanted i made it into a wire frame. I also put in particles that rotate to give the piece depth when you look at the knot the end of each line i used a snipped to make all the points morph randomly. To make this better i would like to have adjusted the particles like colour or shape.

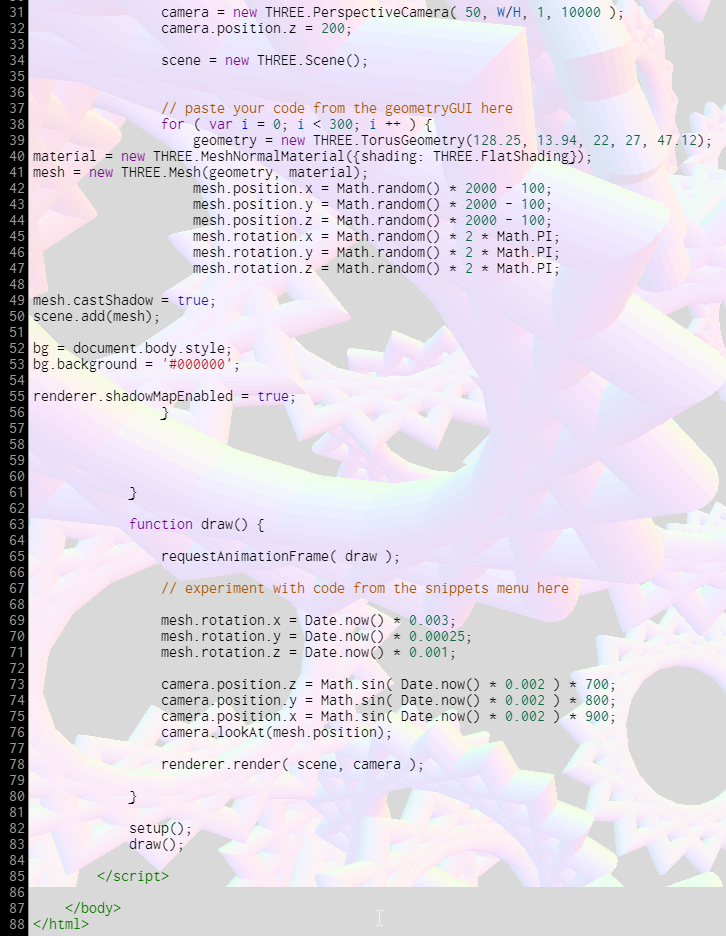
For this output i used a Torus and again manipulated it to get that gear cog look and i used the loop mesh snippet to randomly multiply the mesh and place it in a random space at a random rotation within the variables. The camera is focused and moving in and out of the main mesh allowing us to see from inside of the. To review i would try and make all the gear cogs rotate like the main one was.

Couldn’t get this uploaded but this is an awesome example of creative coding

https://demos.littleworkshop.fr/track

Week 2 – PROCESSING

Week 2 involved processing functions and variables to create processing outputs we were given the outline for a Panda in which we followed we were given the option to change around the code and we added extra colour to my original and for the second version we use the Setup and Draw function to get use to using it

Once familiar with processing i decided to implement the mouse as a variable and use random numbers out of 3 to decide the stroke weight creating more complex shapes in my output. I also layered two ellipse on top of each other but with opposite mouse X Y variables

In this sketch i made an ellipse follow the mouse position and if you hold down left click it will change the colour of the ellipse and make the stroke thicker

This is a cool concept of creative coding that i found

Week 1 – CONDITIONAL DESIGN

This was my groups attempt at recreating the knots design we liked the idea of looping and intersecting with other lines

We modified the knots game instead of lines we had squares

Instructions:
Draw a square on the paper by starting in the square of another colour
You can’t start in the colour square that you just did

With this game I wanted to do something a bit different with Triangles forcing players to fill up the space

Instructions:
Draw a triangle following the lines of the triangles already placed
You can’t start on the colour triangle that you just did or your own colour

In reflection we can see that the non symmetrical lines from human error create something beautiful, I think we also could have used less colours so it looks a more aesthetically pleasing

This is an example of creative coding that i found interesting

Create your own website, free on WordPress.com.Create your own website.
Start free